GD-ROM Re-Alignment Guide 2.0
If your Dreamcast is having trouble booting CD-Rs, original GD-ROMs, or anything. Chances are you need to Re-Align your Dreamcast's GD-ROM laser. I've gotten many emails from people telling me how this saved their Dreamcast and its back in working order. If by some chance this doesn't fix your Dreamcast, send me an email at Shibathedog@msn.com and I'll see if I can help you.
Anyway, this process isn't as hard as it looks, but I take NO RESPONSIBILITY TO ANY DAMAGE YOU MAY CAUSE TO YOUR DREAMCAST! YOU DO THIS AT YOUR OWN RISK!
Now to save your Dreamcast!
First get your Dreamcast, disconnect everything, take any discs out, and set it on a table or something.
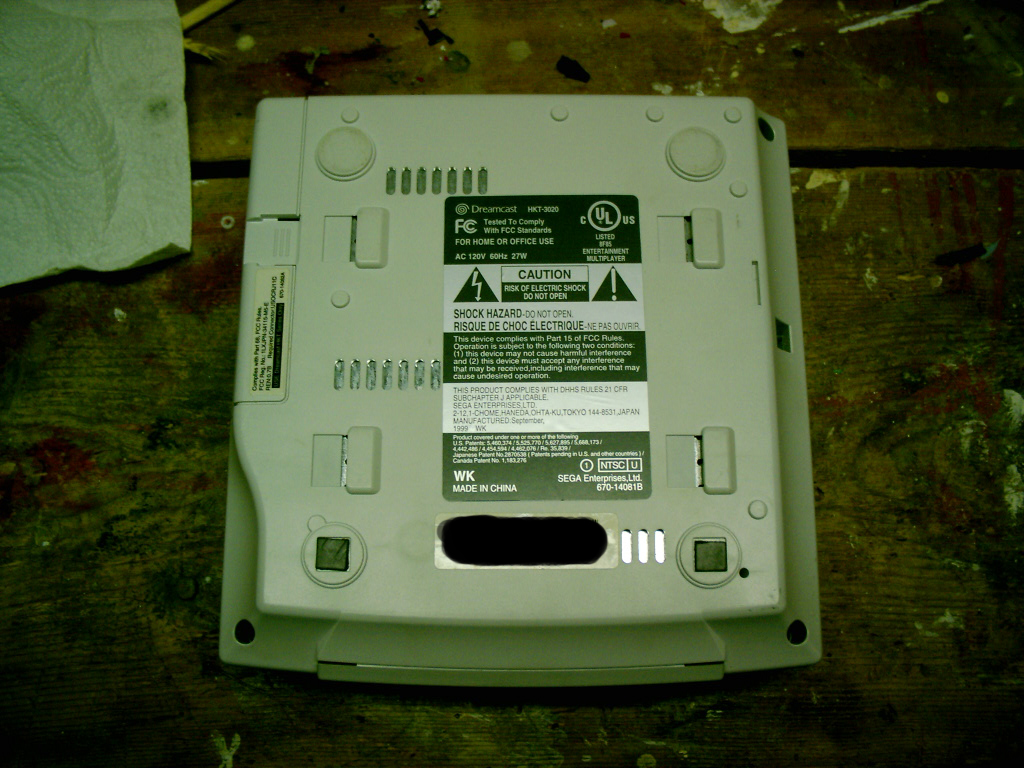
There is the bottom of one my my Dreamcasts. Now you need to take the modem/BBA out of it.
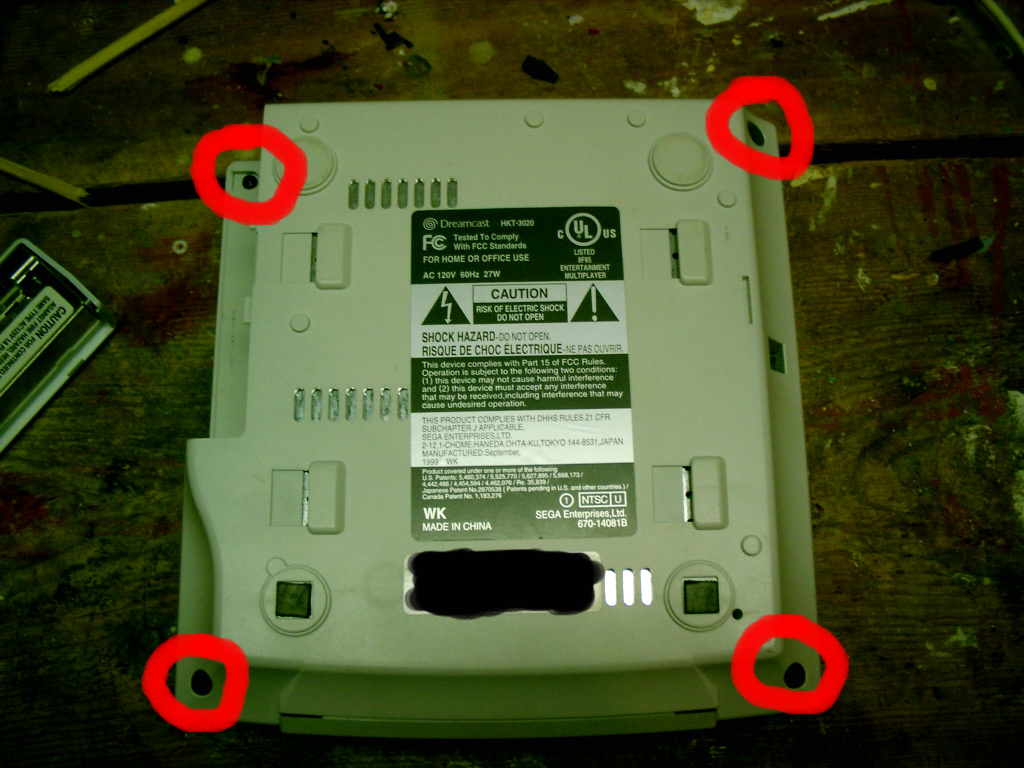
After you remove the modem/BBA you need to unscrew the 4 screws circled in Red and store them in a safe place, They don't need to go back in any certain way, any of the 4 screws can go back into any of the 4 holes.
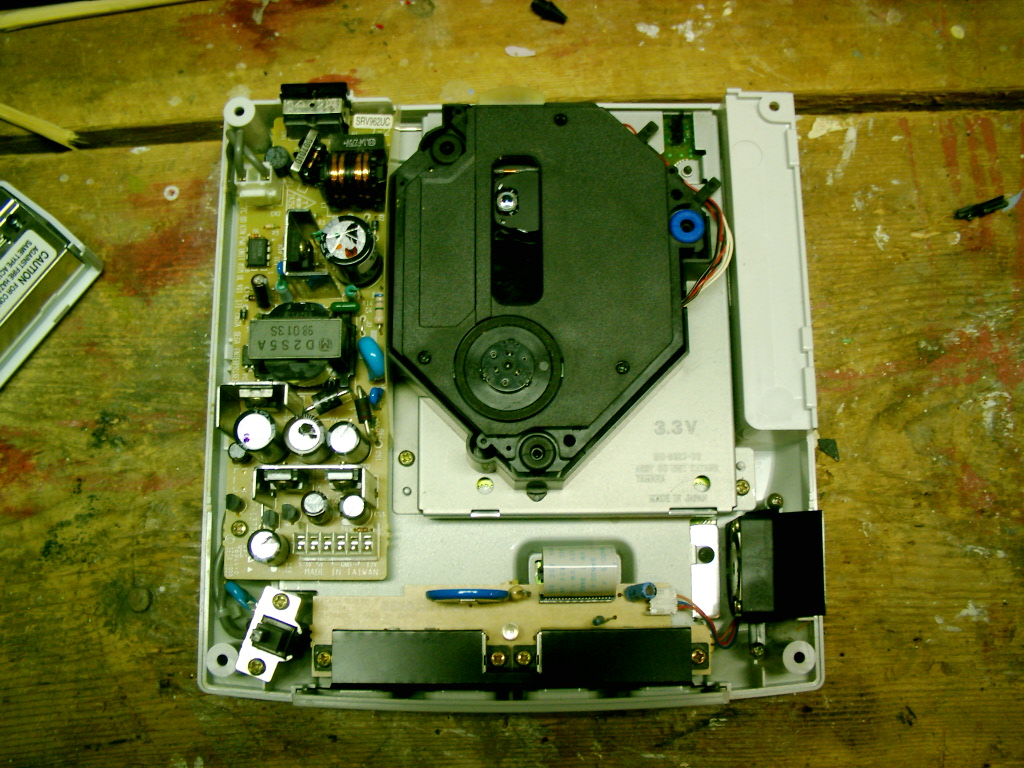
Now turn your Dreamcast over and remove the top.
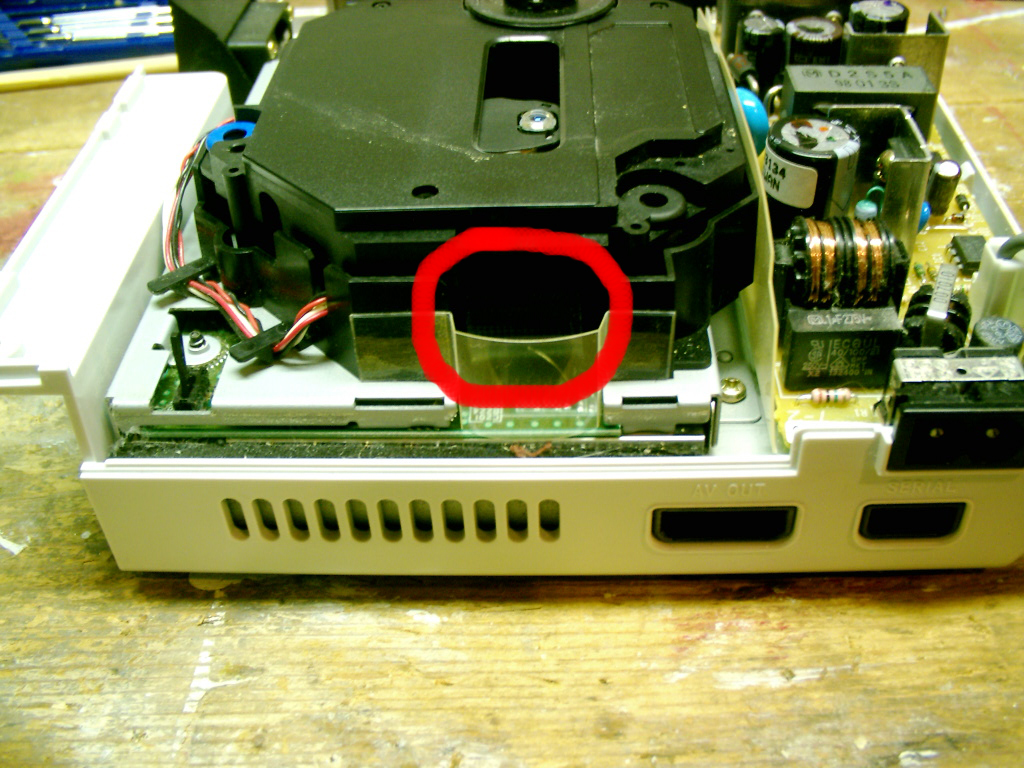
Now turn your Dreamcast around and locate the GD-ROM Ribbon cable. Which is circled in Red on the next picture.
Push the cable inwards with your finger and life up on the entire black part (The part that moves, with the laser in it, not the outer shell part) and then fold the black part over. Make sure that you don't fold the ribbon cable or let it bend a lot or you could damage the cable and until you find a new one your Dreamcast is pretty much screwed unless you ghetto rig it. That cable is a pretty rare part. Your Dreamcast should now look like this.

Now on the Dreamcast you should locate a screw near where the ribbon cable connects to the black part which is circled below.
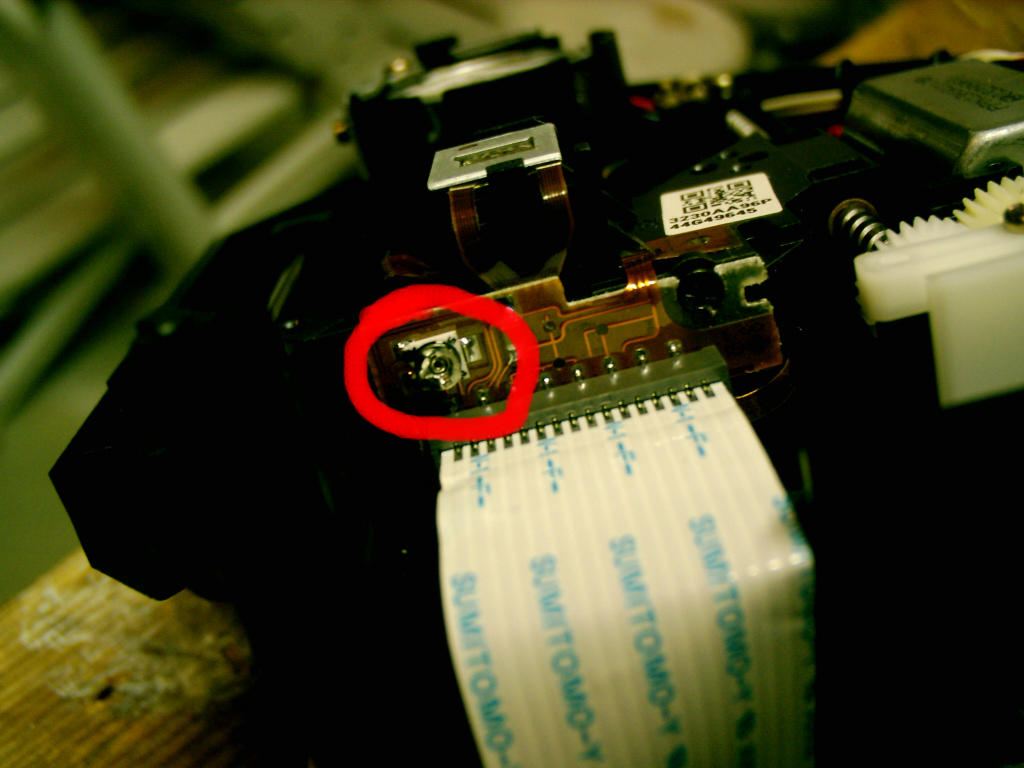
This is the screw you need to tinker with a lot. What I did to fix mine was I got a Burned game on a CD-R, an Original GD-ROM, a Burned Audio CD, and an original Audio CD.
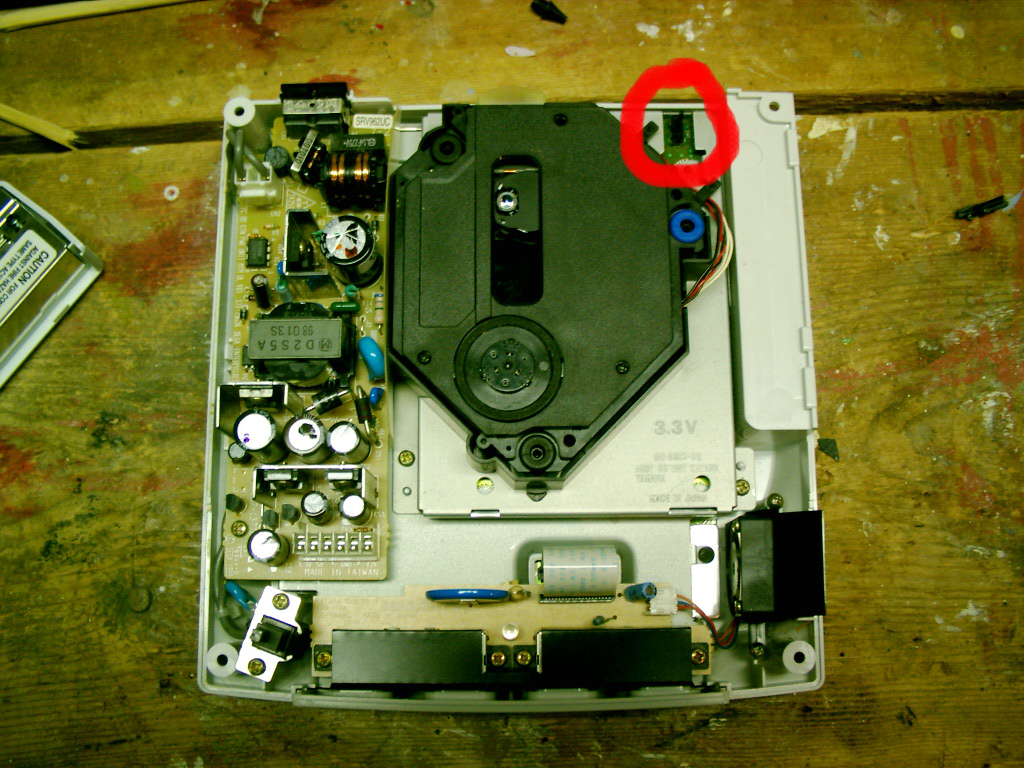
Turn the screw to the left or right just a tiny bit, flip the black part back in place, and plug everything back in, DON'T put everything completely back together or this will take a REALLY long time. Your Dreamcast should look like the picture below. The part circled in red is the CD Lid sensor switch, press it down gently to make your DC think the lid is closed, or use a piece of tape or something.
With your Dreamcast set up like that (Except with that sensor held down, and it being hooked up to power and your TV.) Test every type of CD I listed (or as many as you have lying around), If it didn't work, go back, turn the screw a little more, and try again. This take patience, but its worth it. It shouldn't actually take that many tries to fix it. But it depends on how off aligned your drive is. Oh and by the way, Just because my DC worked at the position I had that screw in doesn't mean that's where yours will start working again, every Dreamcast is different.
Once your Dreamcast is working again, remove the tape and disconnect everything, Re-assemble your Dreamcast, hook everything back up, and start playing!
Good Luck!
PS, If your cable is damaged it will look like this.
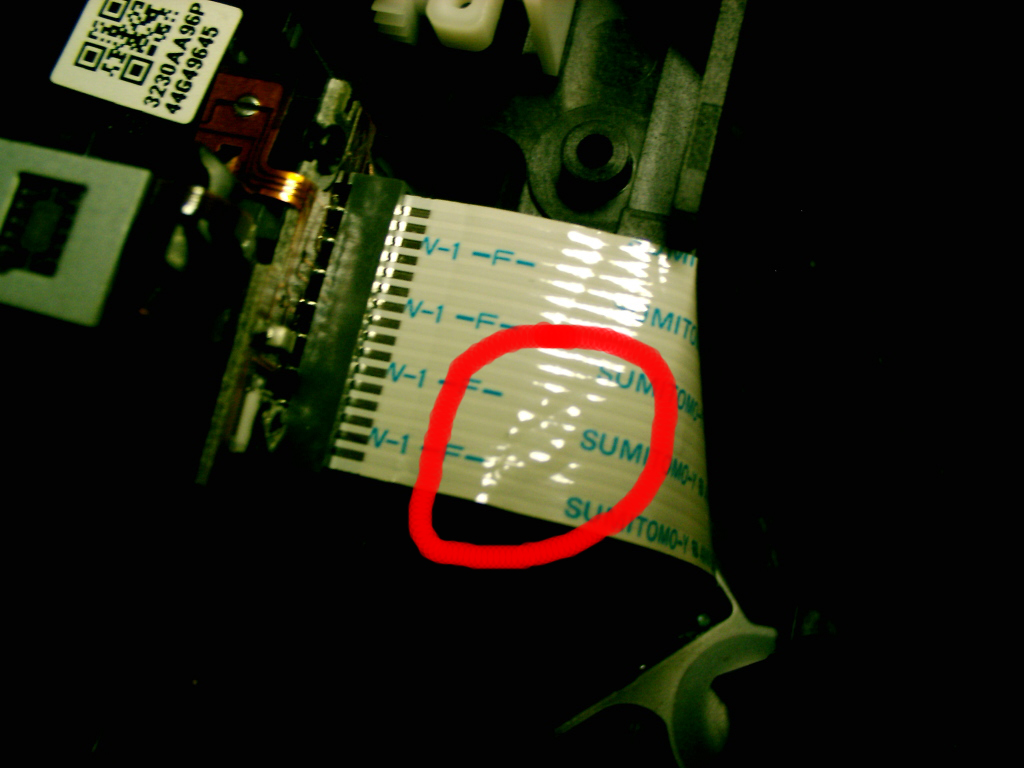
You can't really tell that much in the picture, but the cable has some folds in it, I have a feeling this Dreamcast will need a new ribbon cable soon if it gets any worse.